19.5. IDE Module

The optional IDE module provides an interface to edit theme or module files via your browser. This is useful when you only have browser-based access to Perforce Chronicle. This module needs to be enabled before you can use it. Please see Section 19.3, “Enabling and Disabling Modules” for more details. Also, the web server user needs to have write access to the files in the "sites" folder within your Chronicle installation in order to save any changes made.

The IDE module's editing capabilities are powered by the ACE Javascript Editor, which provides features such as:

[Warning] Internet Explorer

The IDE module's editing interface does not currently work in Internet Explorer 7 or 8. It does work in Internet Explorer 9.

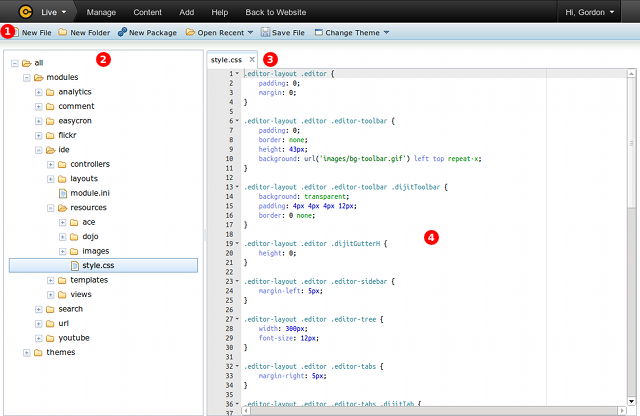
Once enabled, choose Manage > IDE to display the IDE interface:

(1)

IDE Toolbar - Provides the following options:

  1. New File - Creates a new editor tab for an empty file. The file will not exist in the filesystem until Save File is completed.
  2. New Folder - Creates a new directory within the CMSDIR/sites path. A dialog opens prompting for the folder name and path.
  3. New Package - Creates a new module or theme, including all default files or directories. A dialog opens prompting for the package type, name, description, and tags.
  4. Open Recent - Provides a drop-down selection of recently opened/edited files; selecting a filename opens a tab, or focuses on an existing tab, so you can edit the file.
  5. Save File - Saves the file in the currently selected tab. If the tab contains a new file, a dialog opens prompting for the filename and path. The common keyboard shortcut CTRL-S (or Command-S on Mac) will also save the file.
  6. Change Theme - Provides a drop-down selection of available editor themes that influence the styling of the editor.

(2)

Directory Tree: Represents the folder and file structure contained within the CMSDIR/sites path. Clicking on the + button to the left of a directory name will toggle the display of that directory's contents. Double-click on a filename to open a tab so you can edit the file.

(3)

File Tabs: Each file open for editing has its own tab. Click on a tab's label, which represents the name of the file being edited, to display that tab's file for editing. Click on the X button to the right of a tab's label to close that tab and discard any unsaved changes.

(4)

Editor: The editor displays the file's contents. If the file represents a type that the editor recognizes, the file's syntax may be colorized, blocks of code can be collapsed, and certain kinds of syntax errors may be earmarked.

[Note] Drag-and-Drop Active

With a supported browser, you can add or replace files in a directory by dragging them from outside your browser onto the desired folder in the directory tree.

Perforce Chronicle - Release: 2012.2/486814