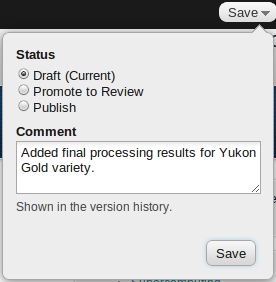
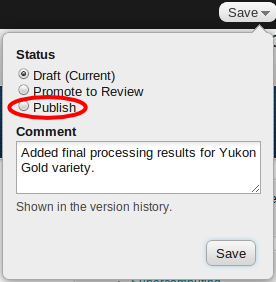
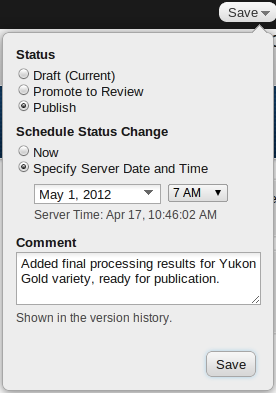
When a content entry is saved, if you have sufficient privileges to change the workflow state, you are given the option to have the workflow change immediately or at a future date. This feature is useful if you prefer to prepare content for publication early and wish to avoid having to manually publish content at the appropriate time.

![[Note]](images/note.png) |
Server Time Display |
|---|---|
The current web server time is displayed to help you decide on a date and time for a state transition. |
|
Content Edits Saved Immediately |
|---|---|
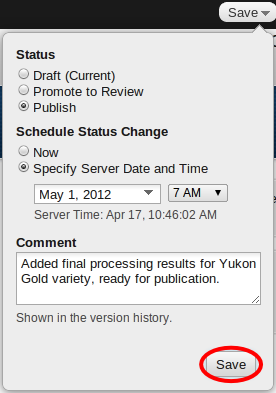
Whether you choose to transition your content to a new state immediately or sometime in the future, when you click any additions or modifications to your content entry are saved immediately. |
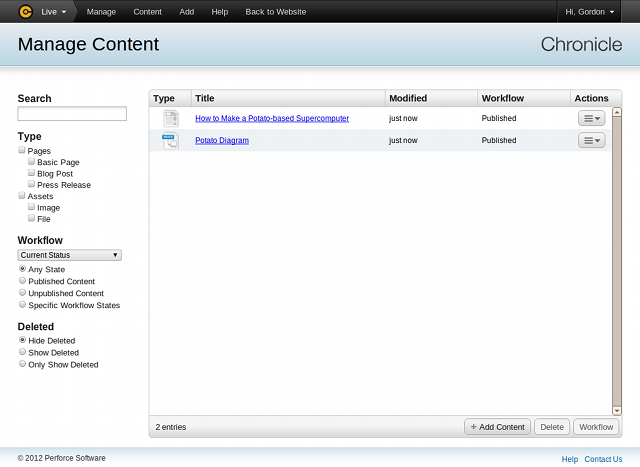
You can also schedule workflow transitions for multiple entries at once by selecting entries via the Manage Content screen.
|
Please be patient |
|---|---|
Scheduling a large number of workflow transitions can take some time. |

|
Do Not Click the Entry's Title |
|---|---|
When selecting one or more entries, click on the entry's row, but not the entry's title. |
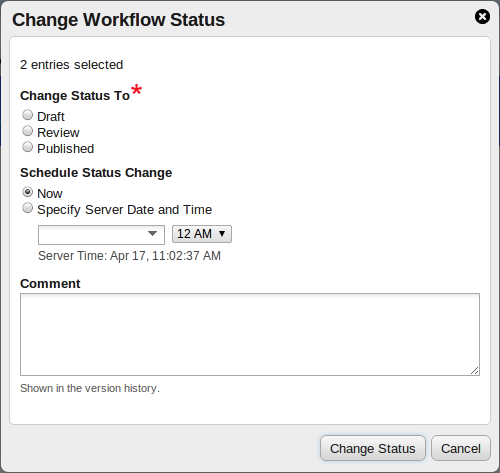
Select a workflow state to which the selected content entries should transition.
The list of workflow states is composed of the intersection of matching states from the workflows of all selected entries. For example, if there are two distinct workflows for all selected entries, where the first workflow defines draft, review and published states, and the second workflow defines draft, published and obsolete, the list of states contains only the options draft and published. The review and obsolete states are not included because they do not exist in both workflows.
Workflow states from multiple workflows may have differing labels. When this occurs, the labels for a common state are all displayed, separated by slashes.
Finally, the list of workflow states does not represent content entries that have no associated workflow.Click the button. Chronicle prepares the transition for all selected content entries.
When successful, a notification appears indicating the number of entries processed.

Upon failure to prepare the transition for one or more entries, a warning dialog is displayed where you can see how many entries cannot be transited to the selected workflow state:
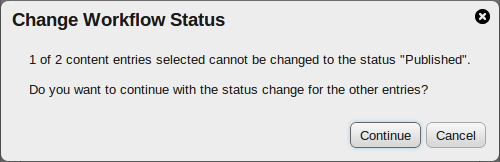
At this point, no changes to the selected entries have been made. Click on the button if you wish to schedule workflow transition for only those entries where it is allowed.
There are several reasons, why scheduling a workflow transition may be denied on some entries:
![[Warning]](images/warning.png) |
Warning |
|---|---|
Please be aware that what you see in the workflow status selection list are workflow state labels (friendlier identifiers) that are not used as identifiers of workflow states when workflow transition options are calculated. |
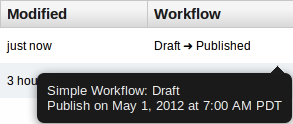
When viewing the content grid, any entries with pending workflow state transitions are indicated in the Workflow column. If you hover your mouse over the transition indicator, a tooltip appears providing details of the transition:
|
Processing Scheduled Workflow Transitions |
|---|---|
Scheduled workflow transitions are processed automatically by the
|